

You really can get started with fountain pen sketching in just 15 minutes — and in this post, we’re going to do exactly that. Below you’ll find a step-by-step guide, two beginner-friendly projects to try, and all the supply info you need to dive in. If you’d like to go deeper, my Sketching with Ink course covers everything from first marks to finished pieces at your own pace.
Learn to Sketch with Ink
Want to build real confidence with expressive ink drawing? My Sketching with Ink course takes you from first marks to finished pieces – at your own pace, with step-by-step guidance and individual feedback from me on the whole journey.
This post contains affiliate links. These don’t affect the price you pay, but I may receive a small commission if you choose to buy through them — a huge support to my blog and YouTube channel, and greatly appreciated.
This might sound like an exaggerated claim, but I genuinely believe you can get started with fountain pen sketching in 15 minutes. It’s one of the most fun and accessible ways to sketch, and in this post (and the accompanying video) I’ll explain how — and give you a couple of easy projects to try.
Which Pen?
For sketching, the LAMY Safari is a long-standing favourite — it’s relatively affordable, well balanced, and well made. I prefer the extra-fine or fine nib. The ink cartridges that come with it also work well for soluble ink sketching (more on that in the projects below).
Find all my recommended pens here.

Of course, you can always go for more premium pens — I love my Platinum 3776, with its ultra-extra-fine nib that’s also beautifully flexible and capable of producing a wide range of marks. But that came only after many years of sketching, so start simple.
Which Paper?
The sketchbook I’m using today is a plain own-brand A5 recycled sketchbook with ordinary paper — nothing fancy at all. I’d suggest almost any paper is worth trying to begin with.
Which Ink?
If you’d like to add watercolour later, you’ll need a waterproof ink. I recommend a couple of options — you’ll find them listed on my ‘Pens and Inks’ page here.
If you’re not planning to add colour, any ink will do. Basic cartridges are a perfectly fine place to start.
Explore Your Pen First
Fountain pens are wonderfully versatile — and individual. Every new pen creates slightly different marks, has a different feel, and behaves in exciting (and occasionally infuriating) ways. Take a few minutes to explore what yours can do before you start a proper sketch.

A Project to Build Your Confidence
Spend a couple of your 15 minutes seeing what marks you can make. If you feel ready, try sketching something in front of you too.
Your Reference Photos
We’re going to sketch two things together: a beautiful Cotswolds house and a gorgeous Cotswolds landscape. Both might feel intimidating at first glance — but I’ll show you how to break each one down into simple, manageable steps.
Step 1: Start with Shapes


Study both photos for a moment, then let’s get sketching.
The first step is simply to find your shapes. Don’t try to be clever — just identify the simple forms in your scene. It won’t look like much at this stage, but these foundations underpin almost all great art.

Keep your lines light and gentle. This makes any early mistakes easy to spot and correct as you go.

If you’re not yet confident with this step, my free course might help — it covers shapes and other core ink art concepts across 10 short, accessible lessons. Find it here.
Step 2: Bold Lines and Textures
Next, add some confidence to your lines — specifically the lines that are working. This is also the moment to introduce textures. Remember that pen exploration you did earlier? Now is the time to put it to use.

Notice the loose scribbles in the trees, hatching for shadows, and small flicks for grass in the landscape. These are all very simple marks — it just takes a little confidence to commit to them.
Step 3: Adding Tone with Water
Now comes the fun part. A little water — applied with a cheap brush, or a waterbrush like mine — activates the ink and instantly creates a sense of mood and atmosphere.

Be gentle with both the water and the brush. The goal is to subtly and softly move the ink, not to wash your lines away entirely.

Step 4: Bold Contrast and Magic Touches
Finally, use your wet brush directly on the pen nib to create small ink splatters for texture. You can also pick up ink from the nib and use it to ‘paint’ with, darkening shadows and adding punchy contrast.

And just like that, your first ink sketch is done. You’ve tackled shapes, textures, tone, and expressiveness — all in a few simple steps. Well done!
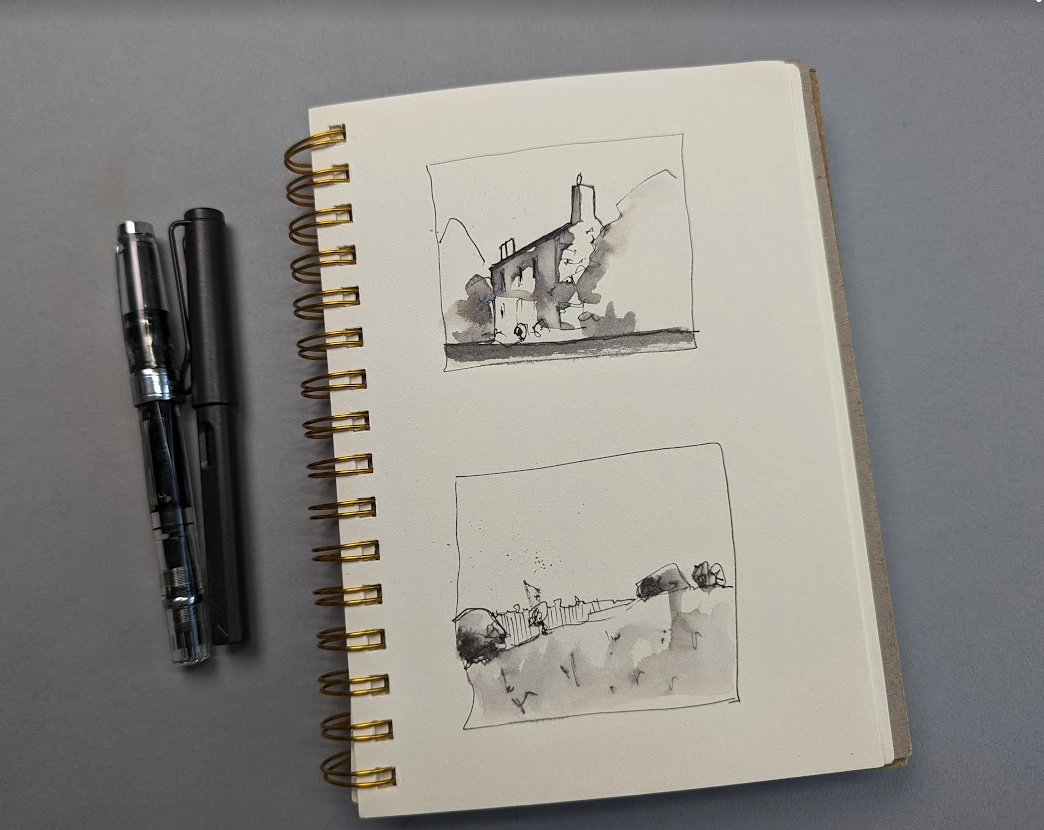
Enjoyed this tutorial? If you’d like to take your fountain pen sketching further, my Sketching with Ink course is a great next step — it’ll take you from confident beginner to expressive, loose sketcher at your own pace.
Ready to Take Your Ink Sketching Further?
You’ve just completed your first fountain pen sketches — shapes, textures, tone, and all. The Sketching with Ink course picks up exactly here and guides you all the way to loose, expressive, finished pieces.